Posts by Chelsea Kunde
My baby is now a little girl: Reese turns 5
 

Reese Turns 5

My baby is now a little girl…

Reese is my baby of extremes. She has been this way since day 1. When she is happy she is at a 10. When she is upset, she is at 10. There really is no in-between with her. I joke that she came out yelling and hasn’t really stopped. She has an infectious personality and she is the kind of person that others just want to be around. She is funny, like actually funny. Not just the funny toddler because they do weird things but she has an amazing sense of humor. She gets sarcasm and how to time out jokes. She understands when she can get attention by being the funny kid. I actually hold my breathe thinking about her in the teenage years. But nonetheless, she really is hilarious.

For better or worse, we always talk as a family about how the kids were as babies. I can’t quite remember when we started this or why but Harper (my oldest) loves to hear how she was mellow, easy and a chill baby. Typical first born, wanting to please. And Reese loves to hear how she was difficult, cried a lot, spit up all the time, etc. Typical second born, bucking the system. Reese was gifted to us, to humble us as parents, to teach us to be flexible, and to shake up our rigid type-A family. I have joked, “when Reese was born, we thought maybe we got a lemon!” But man, we love that lemon now. Honestly, Reese is something very special. It is hard to pinpoint exactly what it is but when you see her, you smile. Not just because she is cute (because she is that too) but because she has an unforgettable charismatic vibe that draws you in.

Reese has taught me so much over these 5 years and I want to share a few things (5 to be exact)…

Flexibility:

So you are telling me that you have more than 1 child and what worked for the first doesn’t work for the second? This was beyond hard for me. I had it all figured out with Harper and then along came Reese and I felt like I knew nothing. Or maybe it is more accurate to say, I felt like I was starting all over again in the parenting world. And to some degree, I was. Some say adding a second is easy, but for me, it felt like becoming a mom again for the first time. Now, I did know more than the first time around. For instance, I knew she wasn’t as breakable as I felt with my first but I also didn’t know anything about her. And I didn’t give myself grace to take the time to learn it. I was hard on myself. Why did she cry so much? What am I doing wrong? Reese had terrible reflux, trouble eating, a cry that could pierce your ear drum, and was wide awake. No sleepy newborn here! Breast feeding was a challenge (read my blog post “am I failing?” For more on this) and I was emotional to say the least. Reese taught me to shut out the noise, follow my gut, and tap into my confidence as a Mom. I had great intuition but I needed Reese to show me that I should follow it. To not worry what other parents were doing or not doing, to not focus on the other babies around, but instead to listen to my inner voice and focus on what is right for me, my family, for us. She still does this for me. She pushes me to act and parent in the way that feels right for me. I am sure I am making mistakes, but I am confidently making them my way. Reese dances like no one is watching (seriously) and she is teaching me to parent in the same way…

Home = Security…

Upon first glance, you would think Reese would want to be out and about all the time. However, she actually is happiest at home… chilling. She is social, yet, she loves to regroup and reset at home. She is just as happy playing games at home as she is going to a jump park. This took me a while to understand because she is so social (and so am I). But she is also a homebody. She has taught me the beauty of being home. Feeling the safest when we are all together hanging out, watching a movie or playing a game. For how energetic she can be, she really reminds me to see the beauty in relaxing at home. Being present in what we already have. Slowing down and not needing to pack in every minute of every day with activities. I love how she loves to just be with us. She is pretty mindful for a 5 year old and I envy that…

Brave…

Reese is my jump in kid. You can always find her trying to play with the older kids, chasing them around, following after her sister to do anything she is doing. She rarely hesitates and jumps right in. This to me is very brave. I think in my older age, I am much more aware of others and wondering what they may think. I tend to overthink and replay scenarios in my head. Then I watch Reese, leaping to join whatever group she thinks looks fun. Dancing & singing always like no one is watching. It is common for her to break out in questionable dance moves for a toddler or sing loudly “this girl is on fire!!!” And of course making everyone around her giggle and smile. I wish I was more like this— follow my gut, jump in, stop overthinking. I hope this part of her always stays. I hope her confidence and braveness continues to shine as inevitably she becomes more jaded and self aware with age, like we all do…

Pivoting

Reese has taught me how to pivot. Honestly, she has forced me to pivot, to bend, to be flexible. She has taught me the beauty of breaking the rules, bending when it is needed, and to know there is always a plan b or c or even d for that matter. Things do not always go as planned. And quite frankly, with kids, they rarely do. This has derailed me in the past. Rattled me to the core. I wish I could say confidently that I now am cool as a cucumber and roll with change. This is not the reality, but I have gotten better. Reese has taught me to be better at this. To know that, even when we must pivot, we will be okay. And not just okay, but maybe even better. A lot didn’t go as planned with Reese from the get go. I actually went into labor with her early, I had massive feeding issues with her and moved to formula quickly, she had a hemangioma (strawberry birthmark) smack in the middle of her forehead, we had to pivot and change preschools not once but twice, and the list could go on. Of course, I have had to pivot with both kids but my Reese, she makes pivoting look easy or at least she adapts so quickly. She doesn’t need as much advanced notice on our plans, she is content with an outing or being home, she truly rolls with the punches & she is the perfect shake up we needed…

Space in my heart…

When you have your first child, it is almost impossible to imagine you have enough room in your heart to love anything the same as your first baby. But you do have room. You have plenty of room. I remember, envisioning Reese when she was in my belly and I saw a little Harper (my first) or a child that looked similar. However, out came Reese, with dimples like mine & very strong Keller (my maidan name) features. I had a c-section with her so Josh saw her first and said, “she has dimples!” And I was so surprised! Is she going to look like me? (my first looks so much like her dad!). And then they put her on my chest and sure enough, I saw it too, I actually thought and said, “she looks just like Uncle Matt!” (my brother). And right there, on the table, I feel in love all over again. Just as hard, just as fast. Now, I always say, some of the best advice I ever received being a mom in those early days was “you love her, but you don’t like her yet, because you don’t know her.” And that was very true with both of my kids. Remember, I am the gal who doesn’t do well with the pivots. So time and learning formed the like but the love, there is room for so much love…

To my baby, my Reese, our moose. Happiest of the birthdays to you, my tiny but mighty, my baby of extremes, my mini me, my Reesie! We love you!

 
Chelsea Kunde
Potty Training 101
 

I remember before I potty trained both my girls, feeling anxious and overwhelmed. That might sound silly coming from me, since I teach potty training for a living ;) Why did I feel this way? Because it is overwhelming and the unknown can feel scary. I am a firm believer in having a plan and prepping children best we can for new things and transitions. It is also helpful to prep ourselves too. 


Remember, you have to be just as ready for this next step as your child is. Both are equally as important for the success of the training. I truly do not believe that you will miss a window and your child will not be able to be potty trained. I don’t see a lot of kids in diapers in college, so make sure that everyone is ready to commit and fully jump in. Have faith that the ideal time to potty train is the time when they are ready and you are ready. Some kids show every sign under the sun of being ready (my second) and some show very little (my first). Both were successfully potty trained. 


With that being said, there are signs we want to watch and pay attention to. There is a trend of potty training earlier and that is fine. However, it is important to meet the child where they are at and not every single kiddo will be ready on the early side. That is also okay. Pushing a child too early with potty training is not a good idea. Toileting skills are very independent skills and we do not want to push a child too early and have them not be ready and in turn not be successful. 

Here are some signs to look out for:

*Remember they do not need all of these to be ready

  • Age Range: 18 months- 3 years

  • Can walk and sit independently

  • Can follow simple directions and commands

  • Shows interest in toilet and going to the bathroom

  • Can communicate when they need to go or have gone

  • Tells you before or after they have gone

  • Wants to be changed immediately after going the bathroom in diaper

  • Less diaper changes throughout the day (can hold pee for 1-2 hours)

  • Dry at nap or night time sleep

  • Interest in toilet/ when others use the bathroom

I often get asked what do I need for potty training? I love this question because again, the prep is key to success! Set everyone up for success. Below are my tried and true potty training key items. These are items I have used, recommended and believe in. Every child and family is different and this list is not the end all be all, but it is a nice start ;) 

Building Blocks Family Go To Potty Training Items: 

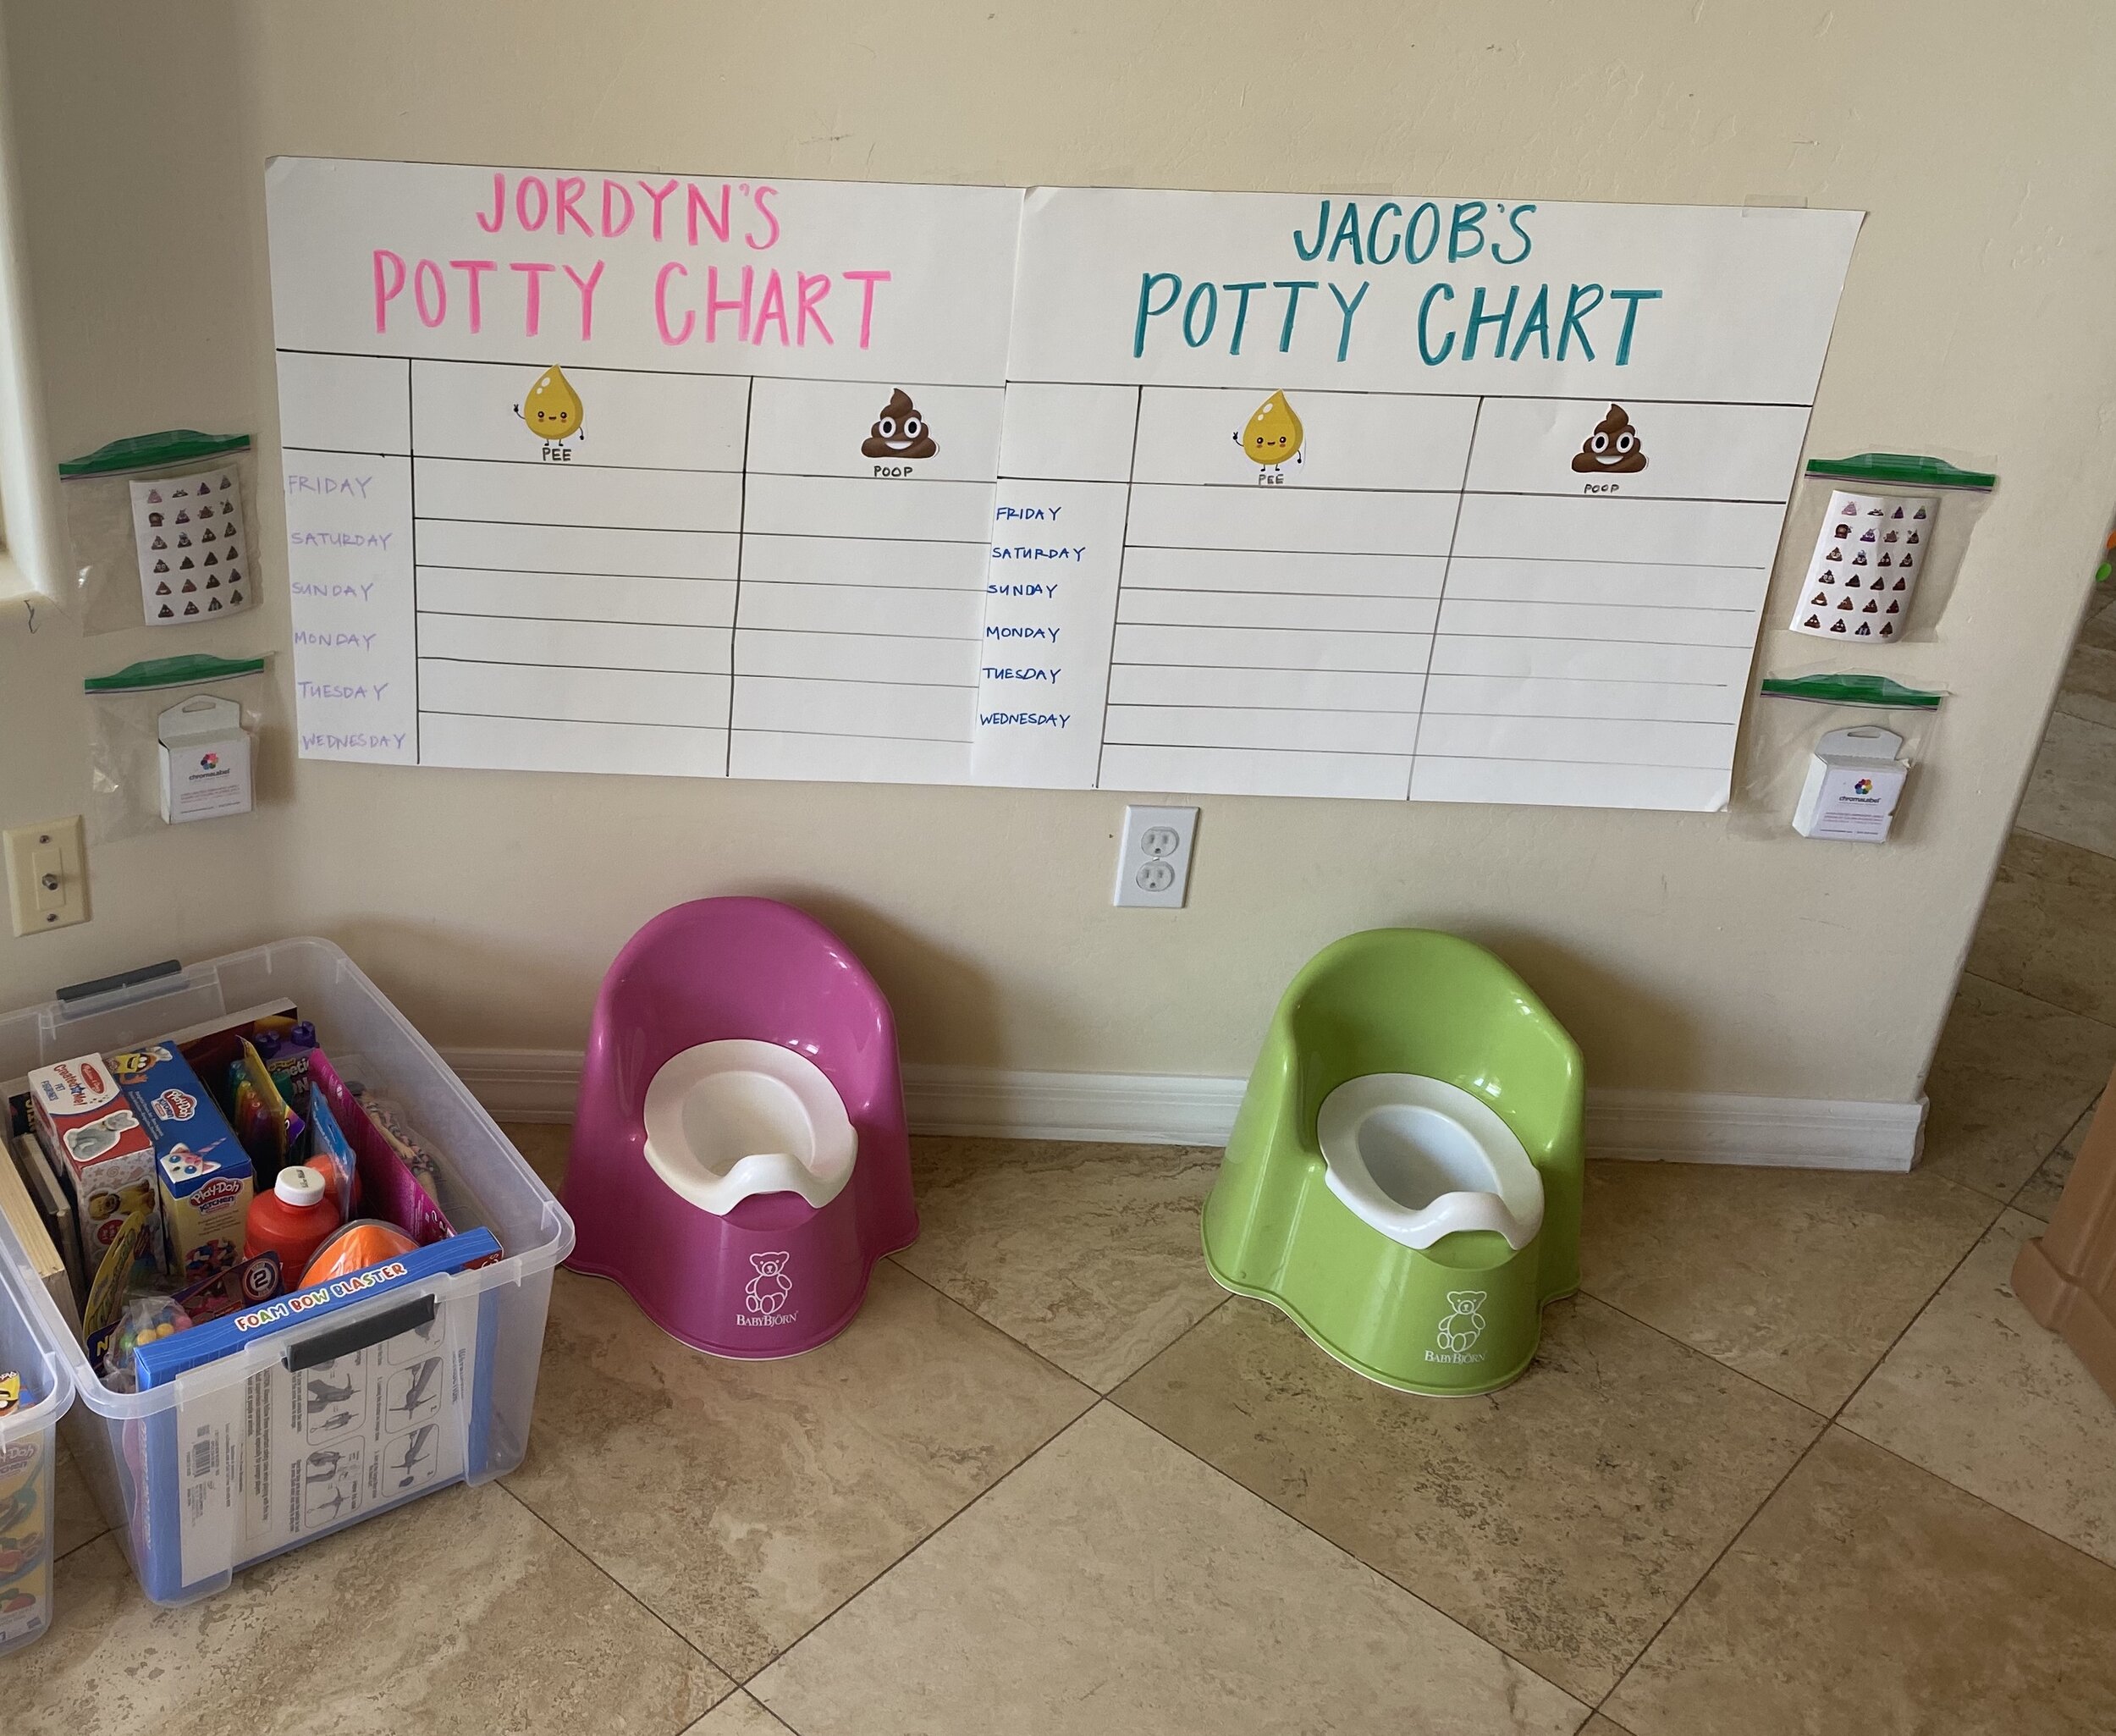
  • Create Reward Chart for stickers

  • Create Reward Bins

  • Get potty seat and/or squatty potty 

  • Purchase new underwear

  • Purchase potty watch 

  • Get rid of diapers (may keep pull-ups for nap/night)

  • Discuss new plan with kiddo

Overall, make sure you prep and everyone in the house is ready to commit to the transition of potty training. Get all items and set up before day 1 and remember to communicate what is happening with your child as well. Deep breath & good luck! 

 
Chelsea Kunde
Pacifiers
 
Image 5.JPG
 

I get asked often about pacifiers and what I think of them. I love a paci! Babies are comforted by sucking and a paci can be great for that! I do have a love/hate of a pacifier in the beginning stages because sometimes the babies do not know how to keep the paci in. And often we become what I call the Paci Rescuer. Try to space out as often you are re-inserting the paci. We want them to learn to keep the paci in. Avoid becoming the Paci Rescuer. Meaning if they spit it out, pause for a moment before giving it right back, they will learn faster to keep it in. You can increase your pause times as the baby gets older. 

The best is when they learn to grab their pacifier and put it in their own mouth. This is a MAJOR win! Some advice? When this happens, I would sprinkle several in the crib so they can find them easily at sleep time. Also, practice this skill during the day. Take their hand and place a pacifier in it, then move their hand to their mouth with the paci. This will help them to learn the skill and become a pro. 

Between 6 months and a year, I suggest paci use mainly for sleeping. If sick or travel, I would give as well. However, when you have good boundaries around the paci, for instance, only used for sleep, it helps to lower the dependence and also is a motivator for sleep. Kiddos want the paci and are motivated to have it. Offering it only at sleep times could be encouraging for a smoother nap and bedtime. 

What is the ideal age to get rid of the paci? Based on research, development and speaking to some dentists, I believe anytime before 3 is reasonable. We weaned my daughter from her paci a week before she turned 3! We also only let her have it for sleep situations before we weaned her. 

Okay, but how do you get rid of the pacifier and not have it by a complete nightmare?

Here are some tips: 

  • Before you get rid of the paci, come up with a solid plan. How are you going to do it? When are you going to do it? 

  • Prep the toddler or baby. You can simply just tell them what is coming. However, I prefer to do a countdown calendar. Place a sheet of paper on the fridge with 5-7 squares for the days and countdown by marking off each day until no more pacifiers.

  • Another way to get their buy in, is to make them part of the process. For example, if you have a number of pacifiers you could toss one a day. I would have your child throw away one a day and then mark the calendar (We did this before we took the last one to do something special with it).

  • Be all in and ready to help work through all emotions that follow.

  • Follow through with the plan. Below are a few ideas of plans for getting rid of the pacifier.

Ideas: Bye Bye Paci:

  • Build-a-Bear or DIY a Build-a-Bear:

Take your child to Build-a-Bear and have them make a stuffed animal and put the last paci in the new bear to get sewed in. You also could do this at home (if you are good at sewing). That way the pacifier isn’t fully gone but can no longer be used. And bonus, there is a replacement= new stuffed animal. 

  • The Paci Fairy

Leave the pacifiers out at night for the fairy. This idea is like the tooth fairy. The fairy will take the pacifiers and then leave a gift the next day. Win/win! 

  • Giving Paci Away

Do you know someone having a baby? This can be a helpful transition to gift the new baby the old pacifiers. Of course they will throw them away for you ;) but it is nice for kids to give away something. Again, I would give them a present in return for doing this good deed. 

  • Throw Away

Simply have them throw the pacifiers away in the trash and say bye bye! It will really signify to them that the paci is gone. You can do 1 at a time and part of the countdown. 

  • Cut the Paci

Cutting the tip (make sure nothing will come off) and typically they don't like that. And you can tell them the paci is broken. Sometimes, this naturally has them uninterested in the paci. 

Overall, I like to reward the child with a replacement item such as a blanket, new stuffed animal, etc. to help ease the new change.  

Remember, whatever method you choose to do, make sure to follow through and don't turn back. If you turn back, it will be harder the next time you try and will be very confusing for the child. 

If your child has a hard time falling asleep without the paci, try and replace it with a comfort object like a blanket or stuffed animal. Give it time as this is a big transition. On average, I would give this change 1-2 weeks to become the new normal. Be consistent in your routine and approach. Let them feel the change and come out the other side. Good Luck!! 

 
Chelsea Kunde
How to Teach: Taking a Deep Breath
 
deep breath.jpg


Teaching children calm down techniques is one of my favorite ways to help with discipline. Remember, discipline is teaching. I feel like “discipline” gets a bad name, but really it is just teaching. Discipline does not equal punishment. Yes, we want to correct behavior and certainly maintain boundaries and have follow through with consequences, however, it is also very important to teach children ways to calm down. To teach children problem solving, replacement behaviors and help them work through their big emotions and reactions. It is one thing to correct a behavior, but it is another to provide information to them of how to do things differently the next time. Teaching them tangible skills to help regulate their emotions. This isn’t easy, takes time, and developmentally emotional regulation is seen in ages 5 and older more often than not. Despite this, we want to practice these skills in toddlerhood. We want to practice them often, when the child is calm, and reinforce these skills by modeling the behavior as well. 

Here are a few ways to teach a deep breath: 

1. The Feather Breath

Grab a feather. Show your toddler the feather. Hold the feather in front of your mouth and say watch me. I am going to make the feather move. Say, “1, 2, 3” and then take a big deep breath and blow out. They will think this is so cool watching the feather move. Then say, your turn! Hold the feather out for them to try. Count, “1, 2, 3” and cue them to take a deep breath. Then offer them the feather to do it on their own. This is a fun way to teach a deep breath  

2. The Birthday Cake Breath

Have your child imagine that you baked a cake or bring over a candle. Have them pretend to blow the candle out by taking a big deep breath in and out! This is a great way for kids to visualize a deep breath. 

3. The Stuffed Animal Breath

Have your child lay down on the ground. Grab a stuffed animal and place on their belly. Have your child take a deep breath. Cue to them that you see their belly moving up and down and how this is a belly breath. For younger kids, it might be helpful to show them this by doing it yourself first. 

4. The Flower Breath

Have your child pretend to hold a flower. Take a long breath in and then breathe it out. Count for your child “1, 2, 3” as they take a breath in to show them a longer breath. 

5. The Hand on Tummy Breath

Lets take it back old school. Tell your toddler to put one or both hands on their belly. Breath in and out with them. Modeling the deep breath. Do this several  times together and then have them do this several times alone. 

All of these work well. I find the fun ones are best because kids learn through play. These feel more organic then the old school #5 option. Regardless, start this young. You will be so surprised that your young toddler can do this. (I taught both of my kids deep breaths at 14/15 months). If you haven’t tried this, and you have an older toddler, no worries! Start now. It will still be beneficial. Lets be honest, I still could work on using my deep breaths more. So, remember to practice this skill too. If you are frustrated, take some deep breaths, tell your kids you are doing some deep breaths because you feel frustrated. Model the correct way to do this. They watch us and copy us. It is important for them to see us use these tools as well. 

When they are learning, it can be helpful to take deep breaths with them. So if they are frustrated say, “I see you are upset, can we take some deep breaths together”? They may say no or keep crying, then go ahead and start your breathing, get down to their level. I bet they will mirror you and practice the deep breaths. Remember, we want to practice these skills when our children are calm not during a meltdown. We want to continue to practice and remind them of how and when to use these skills. This is a work in progress but more practice, the better! 


Chelsea Kunde
Room Sharing
 
Stock photo.jpg


Thinking of having your kiddos share a room? Adding to the family and running out of room, literally? Worried about that transition? Look no further, here are some tips and tricks to set up room sharing for success! 

The number one “rule” with room sharing is to make sure that each child is a good sleeper. What makes a good sleeper? A child who can sleep through the night without interventions from us. We want to ensure a restful night for both children and if one still wakes up, needs intervening, etc. that makes it hard for the other one. It can create unneeded stress for the entire family system. So first and foremost, my recommendation is to wait until you have two good sleepers before merging them to one room. 

Never underestimate the value of prep! Kids thrive on predictability and consistency. It makes them feel secure. Prep them for this new change and get them excited! You could do a countdown to the room sharing. For example, make a countdown calendar and put on your fridge. Countdown until they get to share a room. Do this a week out. Build the momentum and excitement! Explain the expectations. Go over them with your children so they understand the expectations when sharing a room. Another tip would be to make a social story. Essentially write out the expectations of the room sharing and share with your child. Children love books and this is a nice way to learn. Make it simple. Pull up a word document, type 1-2 sentences on a page, paired with a picture, and let the book explain the rules and new normal of room sharing.

Focus on creating space in the room. Divide the room up (best you can) so that each child has their own space. The further apart they can be, the better. It will help to eliminate extra play time and lower the amount of noise they each hear. Do not stress this part, some rooms are not big enough for ample space. Regardless, give each child space in the room that is just theirs. It will help to empower them to enjoy their new shared space and still have some independence. 

Speaking of noise… One of the biggest concerns people share with me is the worry that one child will wake the other. I get it, that is a very valid worry and may happen. Especially at first, we need to give this new adventure time and patience. Adding an additional sound machine to the room can help. More white noise, the better. I also love the idea of each child having their own sound machine or better yet a toddler clock/sound machine combo. My favorite is The Hatch light. 

How do you minimize extra play and rowdiness at bedtime? Sometimes it can be helpful to stagger the bedtimes. Put the younger child down first and then the older one about 30 mins or so later. This is in hopes that the younger one is already asleep when the older once comes in. This works particularly well when you have a child in a crib and one in a bed. Sometimes two older children may have similar bedtimes and this won’t work as well. Regardless, remind them to stay in their beds and be quiet at bedtime. 

Practice makes perfect. More like practice can help to shape the new behavior and be more successful in this change. Role play with your children during play time about sharing a room. Show them the correct way to do it. Practicing during playtime helps them learn in a fun way. It reinforces the rules and expectations without sounding like you are just lecturing. That can do the opposite and have the kids rebel against the rules. Pretend play is a fun way to go over the new expectations. 

What about nap/rest time? Sharing a room during this time can be more difficult. Day time sleep is much harder then night time sleep. If possible, it might be a good idea to separate the two children for the day time sleep. This especially makes sense if one child naps and the other does quiet time. Now, do not get me wrong, some kids are great with room sharing for both nap and night time sleep. However, if this becomes a challenge there is no harm in separating the kids for nap/rest time. 

Room sharing can feel daunting and overwhelming. How does this even work? Can it really work at all? I am here to tell you yes! I have so many clients whose children room share and they are very successful! I will say that it takes prep, time and patience. So deep breaths, prep as best you can and give it lots of time to gel.

 
Chelsea Kunde
Transition to a Big Bed
 
bigbed.jpg

Moving to a big bed from the crib is a big transition and shift. Not to mention, it can be a very anxiety provoking change for parents. I personally always drag my feet to do this change. I love when my kids are safe and confined to a crib. I understand the worry around this change but with these tips, the transition will hopefully be smoother. 

So when do you make this change? The ideal time to move a kiddo to a bed is as close to age three as possible. They are able to understand the responsibility of a big bed better. However, there are circumstances where you must move your child sooner. That may be a new addition coming and you need the crib. That could be a child that climbs out and you need to transition for safety reasons. Regardless of the age, prep and consistency are key! 

Do you move your child to a toddler bed, convert the crib, or move to a regular sized bed? This is up to you. I find that after age 2 just moving to a normal sized bed is helpful to eliminate multiple transitions down the road and saves you some money in the long run. If a child is very young, converting the crib or having a smaller space for them to sleep like a toddler bed could be helpful. If you do move to a normal sized bed, I would use safety rails to protect them if they roll off the bed. 

Here are some tips and tricks for a smooth transition to a big bed: 

  • Prep: Make a count down calendar about 5-7 days prior to the move to a bed. Get them excited and involved in the change.

  • Routine: Make sure to continue a consistent and predictable bed time and nap routine. Predictability helps children to feel secure and safe. Even with this change, make sure to keep things consistent.

  • Safety: Make sure the room is “toddler” proofed. This might mean taking out more things until child is used to new bed and new rules. Make sure all furniture is bolted to the wall. You can put a baby gate outside the door or change the lock to be on the outside. This is to ensure the child is safe and does not wander the house alone at night. You never have to use a lock or a gate but sometimes this is helpful especially the younger the child is. Temporary locks called monkey locks are a good option as well. I use locks as a back up plan if my child does not choose to follow the expectations.

  • Realistic Expectations: Change is hard. Be empathetic to their feelings and the process. Lasting change takes time. Know, this too shall pass. Stay consistent and they will adjust.

  • Control: There are several ways to help your child feel more in control of the situation. For example, you can involve them in the change. For instance, you could take them with you to pick out new bedding. Use a toddler clock and have them “set it” or turn it on each night before bed and nap time. Have them pick out a new pillow, stuffed animal, anything to reinforce this change and get their buy in. (*helpful hint: start toddler clock while they are in crib because easier to be consistent with when they are learning)

  • Reward new behavior: Use a behavior chart to help reinforce new behavior of staying in bed and sleeping in bed. Sticker charts are not the end all be all but can help reinforce and shape the new behavior (staying in your big bed). Use sticker chart for only 1-3 weeks.

  • Explain expectations: Explain the new expectations visually and verbally. Repetition is key. Discuss these new expectations before bed and nap every day. You can make a social story (check out my instagram highlight bubble titled “social story” for directions on how to do this). You also can purchase any books on sleeping in a big bed.

Overall, remember to be calm during this transition. Children will feed off your energy. Set everyone up for success by prepping, having a plan and being consistent. Give the change some time. Know that they may play more at nap time or bedtime due to their new freedom but that will grow old in time. Take deep breaths, prep, and go for it! 

 
Chelsea Kunde
Calm Down Techniques: Parenting Edition
 
IMG_1147.JPG
 

When we become parents, a lot of our attention and time goes to our kids. This is normal, but it is important to remember to take care of yourself too! We often solely focus our attention on how to calm our children and forget about calming ourselves. We focus on how to teach them to calm down when angry or upset. How to help them during big outbursts or tantrums. We forget to practice these skills ourselves. It is important to find ways to calm our own bodies down too. It not only helps to model the skill of calming down in a healthy and productive way, but it also helps us to react in a more effective way towards our children when they are upset or frustrated. 

I know that for me, I really have to remind myself to do this. Life is busy. Things can feel chaotic and move quickly. I focus a lot on my kids practicing calm down techniques, reminding them of these skills before an activity, and following through when needed. I tend to forget these same skills myself. When I am feeling overwhelmed, angry, frustrated, all the things, I forget in the moment to use my calm down skills. The same reminders I give my kids over and over again, I neglect myself. I have to practice. I have to remind myself to practice what I preach. Show my kids how to use these skills in action, in real time, when I am actually frustrated. At age 36, it is hard to emotionally regulate in a productive way each and every time before responding. This is a nice reminder that children are learning this too. Their brains have not yet developed the ability to regulate on their own. They need practice, they need the skill set, they need the help. An easy way to help build this skill set is to model the correct behavior. 

Remember, we are human. We are not perfect. We are going to react and over-react at times. However, the more we practice these skills, the more second nature they become. This is the same with our kids. Practice, practice, practice! Have them see you do things well and also have them see you do things not so well. Use that as a teaching moment. For instance, you can say, “Mama should of taken a deep breath when I was frustrated instead of yelling. Next time, I will work on that”. Remember, disciple is all about teaching & learning, not perfection. 

Here are a few calm down techniques (parenting edition)

  • Deep Breaths

Practice taking belly breaths when calm. Place a hand on your chest and stomach. Practice moving just your stomach when breathing. That way you will know how to correctly breathe to calm your body down in the moments of stress. 

  • Counting to 5 or 10

You can count up or down in numbers. It is amazing how the distraction and counting slows your breathing down without you even realizing it. 

  • Taking a Break

Sometimes, putting yourself in a “time-out” can be impactful. This is a great way to model taking a break for your kids. 

  • Screaming into a Pillow

This one sounds so silly but it really can be helpful to release that scream! Cathartic. Give it a try next time and see if it helps. 

  • Body Relaxation

Tense up and then release different areas of your body. Start with your shoulders. Tense up for 3-5 seconds and then relax for 3-5 seconds. Do this 2-3x and add in other parts of the body as well until you feel calm. 

  • Positive Statements

 Say a positive statement to yourself over and over. For example, you can say something like, “I am calm and strong” or “I am human and need a break” 

You do not need to use all of these. Pick a few that speak to you. That feel easy to do. Practice. The more you use them, the better at it you will be. Trust me, these skills take time to build but once they do, they can be really helpful to handling all the big emotions and reactions our children have. 


Chelsea Kunde
Safe Sleep 101
 
safe sleep pic.jpg

Safe Sleep Practices

(for the first year) 

I remember being pregnant with my oldest and researching SIDS (Sudden Infant Death) A LOT! I would spiral thinking about it. I am super type-A so researching and gathering information helped me. Learning the new “rules” also seemed to calm me. For whatever reason, once Harper was born, I was calmer about the whole thing. Never fully calm, I practically slept with one eye open the first few weeks she was alive, just to make sure she was breathing. I do think knowing the information on safe sleep and putting it into practice helped greatly. 

My goal with this blog entry is not to scare anymore. It is to inform you. It is to provide education on safe sleep so that everyone can feel more comfortable and know you are doing all you can for safety. Below is information on safe sleep practices for the entire first year. I strongly encourage all my clients to follow these practices for the first year of life. 

So what is SIDS anyways? SIDS (Sudden Infant Death) is the sudden and unexplained death of a baby younger than 1 year old. More than 90% of SIDS deaths occur before babies reach 6 months of age. Even though SIDS can occur anytime during a baby's first year, most SIDS deaths occur in babies between 1 and 4 months of age. Over the years, there have been changes to the recommendations around sleep for babies. In the 90s, the “back is best” campaign reduced the risk of SIDs by 50%. This is the idea of placing the baby on their backs for sleep periods. Although the risk of SIDS is low, it is very important to follow the recommendations with sleep, know the research, and make informed decisions for your family. Also, of course seek advice from your pediatrician as well. 

Below is helpful information for safe sleep practices & recommendations: 

The acronym used for safe sleep: ABC

A: Alone

B: Back

C: Crib

*The AAP specifies the crib, a bassinet, and/or a play yard (like a pack n play) as the three spaces a baby should sleep in. 

Safe Sleep Recommendations:

  • Put baby to bed on their back each and every time

  • Put baby to sleep on a hard surface (i.e. bassinet, Pack n Play, and/or crib).

  • Avoid sleeping in bed with your baby— This is not only unsafe, but carries risk of suffocation.

  • No loose bedding or items in the crib until 1 year of age (a pacifier can be used but avoid the ones with a stuffed animal on the end for sleep, as those are counted as an item in the crib).

  • Place on a firm mattress

  • If swaddling, use a sleep sac or similar product with a zipper and/or velcro. You can swaddle with arms in but there is contradicting research with this and SIDS risk (see article below for reference)

  • Offer a pacifier at nap time and bed time. There is research that showing this helps decrease the risk of SIDS

  • Avoid smoke exposure during and after pregnancy

  • Breast Feeding has also been shown to lower the risk of SIDS

  • Avoid over heating the baby

  • Avoid exposure to smoking

The American Academy of Pediatrics takes a neutral stance on swaddling. Please refer to this article for information on how to safely swaddle, risks with swaddling and AAP recommendations for safe sleep (as stated above). 


ARTICLE


Chelsea Kunde
Discipline 101
 
discipline%2B101%2Bpic.jpg

Discipline 101

6 Helpful Tips

When do you start discipline? I hear this question often. Good news? You most likely already are! Check! Seriously, you are already doing it. Discipline does not mean punishment. Discipline is a way to teach. You most likely have been discipling for a lot longer than you even realize. For instance, redirection. This is a form of discipline. When our children are young babies, we use redirection all the time. They walk over to something dangerous or breakable, we move them or redirect them to something else, something more appropriate and safe. 

What are other ways you can start to teach expectations? Aka start discipling? Have no fear, below is a great start. Discipline 101: 6 tips for success and a platform to begin. Remember, discipline is teaching. There will be days of mistakes and days of successes. We build on skill sets and chip away slowly at the goals. Give these tips a try & watch the learning begin. 

Meet Basic Needs

This seems like an obvious one but it is often overlooked. Have you every wondered, what is going on with my child? Often, it can be fixed simply by making sure all of the basic needs are met. Have a check list for yourself and ask yourself if their basic needs are covered. For example, hunger, thirst, and sleep. If a child is hungry aka hangry (angry/hungry) you will see some big behaviors. If a child is thirsty, you could see a meltdown. Sleep is a vital piece to the puzzle as well. A well rested kiddo, is one that is more pleasant to be around overall. Sometimes, kids are thirsty but they don’t even realize it. They forget to ask. So make sure these basic needs are met daily. It can make a big difference in behavior! 

Create Consistent Routines/Structure

Children thrive on routine and structure. It is important to provide this to them. They need a home base that feels safe and in turn allows them to feel secure. This happens quickly if there is routine and structure built into their daily lives. This does not mean you have to be rigid. This just means to create a shell of consistency for your child through routine and structure. We do x before nap everyday. We eat breakfast at the table with Mom. We put our shoes on when we play outside. There are certain tasks that need to be done daily, when we add a consistent routine to the day, kids feel secure and typically behavior is better. 

Create a Child-Friendly Environment 

It is important for kids to have areas that are kid-friendly. Areas that have some toys and items they can access freely. This does not mean your entire house needs to be a kid zone. What it does mean is that it is important for kids to have areas that are kid friendly. Areas that they can go to each day and know they will find their favorite blocks or books to play with. Young children are craving independence and their imaginations are running wild. Lets set them up for success to build upon these skills and create positive experiences at home. 

Establish Boundaries 

It is important to create boundaries in any relationship. This is no different with our children. I always give the example of using the bathroom. It is perfectly normal to want to use the restroom alone and believe me, your children will want that same privacy one day too. So establish it, shut the bathroom door when you are using the restroom. This physical boundary is an easy one to set. Boundaries are an important thing to instill and teach our children. It is important that they learn to respect others space, that they understand that they have a voice in their own space, and how to ask for that space when they need to. Another example is the “tickle game”. Think about times where you tickle your kids and they may be laughing and saying “no” at the same time. If you hear no, stop. This teaches them that no means something and you respect the boundary they are requesting. You can cue them and say, “if you really mean yes keep tickling you can say, more tickles please”. This creates a healthy boundary while also teaching them the importance of no and that they control their bodies. 

Practice Independent Play 

Toddlers do not need to be entertained every second of the day. They have amazing imaginations, let them use it. It is amazing what they will play and do to entertain themselves. Am I saying to never play with them? Of course not. However, allow them a safe place to practice independent play times. Start small and build on how long they can do this for. If they get upset when you are not right there, assure them that they are okay. You are okay Timmy, I am right here just making us lunch. It is really important to reassure our kids that they are okay but also encourage the independence as well. It is a balance, but the more you practice the better they become at it. Confidence builds and you will be amazed at all they can do independently.  

Successful Communication 

Practice telling them how you want them to behave instead of only saying no. Are you going to say no? Of course, and that is healthy. Remember, boundary setting. However, it is important to not just say no. They does not provide a teaching moment. Tell your child the behavior you want to see next time. Allow them a chance to learn and correct for next time. Instead of saying, “no hitting”, you can say “Timmy, we use gentle hands instead of hitting. Can you show mama gentle hands?” And help him by showing him what that looks like and pairing it with the phrase gentle hands. Another important aspect of communication is addressing feelings first. Show your child empathy by labeling their emotions and/or recognizing when they are upset. “I see you are frustrated!” Or “I bet that is a bummer.” These types of phrases will validate their feelings, teach them all the different emotions we feel and let them feel understood. 

Practice these 6 tips and tricks on your parenting journey. They will help set the stage for success! 

 
Chelsea Kunde
Nightmare VS Night Terror
 
nightmare pic .jpg


There are many changes in toddlerhood that can throw us as parents. You may have a good sleeper and routine and then, boom, night wakings begin again. What is going on? This can be frustrating and troublesome all at the same time. Around age two, children start to develop real fear. They feel that emotion and it is very real. This can make a once seamless bedtime derail and become problematic. This could also be a time when your child has nightmares or a night terror. How do you know what it is? What is the difference between the a nightmare and a night terror? 

A nightmare is exactly how it sounds. A nightmare is a scary dream that happens mostly in the second part of night. This happens during a REM sleep cycle. Often times, when a nightmare happens, children will wake crying or screaming. They may call out for you too. Toddlers age two and under have a very hard time understanding if something is real or not. For instance, it might be hard for them to realize that what they just experienced was not real but instead a dream. Between age 2-3 young toddlers are able to distinguish between was is real and what isn't. They may even begin to discuss their dreams with you and remember a dream that occurred the night before. As children get older, they may have a bad dream, wake up, and be able to understand that they are safe because it was “only a dream”. Much like we do for ourselves in those moments. 

A night terror is different than a nightmare. A night terror occurs most often in toddlers and preschoolers. They typically take place during the deepest states of sleep. The deepest stages of sleep normally occur in the first part of the night. While night terrors can last as long as 45 minutes, most are much shorter. Most children fall right back to sleep after one because they actually have not been awake. Unlike a nightmare, a child will not remember a night terror. 

There are some typical signs of a night terror:

    • Crying (uncontrollably)

    • Sweat

    • Shaking

    • Breathing Quickly 

    • Have a terrified, confused or glassy-eyed look 

    • Thrash around, scream, kick or stare

    • Not recognize you or realize you are there

    • Try to push you away and not want to be held

    • Don’t wake up 

Now that we know the difference between the two, how do we help? Here are ways to troubleshoot. When anything is out of the ordinary with sleep, I always encourage people to go to their child and assess the situation. With my own children, I always pause a few minutes because they are both are very vocal when they dream at times and often will go back to sleep without needing any intervention. You are the expert in your child, and it never hurts to do a check in. For nightmares, It is important to comfort your child but not let them think they should be scared. You can avoid statements like “the dark is scary. I understand it is scary being alone”. Instead, reassure them they are safe and offer a solution. “You are safe, you had a bad dream, lets make your night light brighter so you can see better, does that sound nice?”. Avoid bringing them into your bed because this can become a habit quickly. Instead, comfort them in their own room. If they do not have a night light, add one. Sometimes toddlers around 18months to 2 years of age really start to develop a fear of the dark. Adding in a nightlight can be a game changer. They may not know how to vocalize to you they are scared of the dark, so offer this as a solution. We love our Hatch because the night light can be very dim. 

Sticking with solutions for nightmares, depending on your child’s age, discuss the dream. Around age two-three children are able to understand that a dream is different then real life, so discuss this with them. Explain that our minds are so big and smart that sometimes when we dream, we dream big with wild ideas. This is different than real life. Assure them of this. Sometimes these discussions can be fun the next day. You share a silly dream you had and allow the space to discuss the dreaming (good or bad). 

There can be a variety of reasons children have bad dreams and/or night terrors. One thing to be sure of, is to re-set when you need to. Overtired kids are more likely to have these types of experiences. Keeping a good sleep schedule can be a great solution. Pay attention to any stress or new experiences your child might be going through. This can also impact our dreams. Just like it does for adults. Talking through big changes and anything stressful during the day can carry over for a nice solution at night time. 

Lastly, I always like to think of solutions to do for next time. An idea would be to make a monster spray. For instance, if your child is scared of monsters, fill a spray bottle with water and tell them we will spray the room and only happy thoughts and people can be there. Don’t focus so much on the monster but on the happy! Another good reset for next bedtime is to tell them to think of 2-3 things that make them happy. This will ease their stress at bedtime and become a good solution for after a bad dream. They can start to use this intervention “happy thoughts” and eventually will use on their own as they age. 

Night terrors specifically do not need an intervention. I know this sounds weird and is hard because your child is upset, however with a night terror, they are not really awake. The research shows they do not even remember these experiences. They also typically don’t last long. My advice would be to do a brief check, make sure they are safe, and allow the night terror to pass. Typically they are brief 5-20 minutes in length. 

As always, follow your gut, you are the expert in your child! And if something feels different then what is described above, always reach out to your pediatrician as well. 


Chelsea Kunde
Newborn Baby Essentials
 
new 3.jpg

Top 8 Baby Essentials 

How much stuff can a baby really need? A LOT! I remember the nesting phase so well with Harper. I would crawl or waddle into bed and lean over to my husband and say, “do you know what we need”? and he would smile and say, “what do we ‘need’”? And he would appease me and off I would go to order something else we had to have. I think my needs were more like wants, but that song and dance felt never ending I am sure! 

I remember the first time I walked into Buy Buy Baby. I was a deer in headlights. They give you a list of essentials to register for that I swear had 5,000 items on it. I was so overwhelmed. A friend of mine took me there to help me register for my shower and I am so thankful for her. I ended up doing the same thing for several friends to show the same love she showed me. She grabbed the list of “essentials” and started crossing off items and saying, “you don’t need this, but add this.” Or “You will never use this” (with a big slash through the item that wasn’t needed). She also added items that she wished she had from day one and pointed out which items I will want, but not now. Again, she was like a baby angel gifted to me for the hours we spent that day registering. I still burst into tears when I got home (hormones). I also burst into tears after my shower realizing we had gotten so much stuff and where does it all go? Or better yet, how do you use it? I was spiraling! (hormones). Anyways, I digress but I wanted to put together a quick blog post to help new parents. You inevitably, will get more than these 8 items, we all do. But these are the important ones. These are the items you will use right away for the infant stage and help with sleep! 

Top 8 Baby “Recommended” Items for night sleep 

1.Bassinet:

  • It is important for the baby to have their own sleep space. A bassinet, play yard like a pack n play and crib are perfect. Many play yards have a bassinet attachment you can use as well. My favorites (today) are the Halo Bassinet or Pack n Play. The pack n play you will use throughout the first few years so this is a good investment. 

2. Swaddles/Sleep sacs

  • If you are going to swaddle, I recommend a swaddle and/or sleep sac that has velcro or zippers. My favorites are The Halo, The Woombie, The Ollie, Infant Summer (brand), Sleepea and The Nested Bean. 

3. Sound Machines

  • I recommend using a sound machine with infants and children. My favorite sound machine for price and volume is Homedics. Also, The Hatch is a great product as you can use it in toddlerhood for a sound machine, night light and toddler clock all in one.

4. Pacifiers 

  • I love a pacifier. Research has shown that offering a paci can decrease the risk of SIDS. It also supports, that breast feeding can be just as effective when using a pacifier.  There are a variety of different brands and styles. Have a few different types on hand and see which your baby prefers. I suggest starting with Soothies. Before age 1, do not use a pacifier with an animal attachment for sleep as this is comparable to a stuffed animal and a loose item in the crib.

5. Diaper Cream

  • I suggest using diaper rash cream as a preventive to diaper rash. Many newborns have sensitive skin. The most effective time to use this would be before bed time. However, you can use it at other times as well and whenever you need to. My favorite creams are Vaseline and Boudreaux’s Butt Paste.

6. Gas Drops

  • I recommend Little Remedies but there are other options available. Please consult with your pediatrician to find out what is best for your baby.

7. Burp Cloths

  • These are great to have on hand during the day and at night. I have found using cloth diapers as burp clothes work well because they are absorbent and soft. 

8. Diapers & Wipes 

  • There are many different options of diapers and wipes. I have heard and found success with Pampers for girls and Huggies for boys. Try different brands to decide what works best for your child. Once they are big enough for a night time diaper, I would use one at night as they are more absorbent. 

*Please know that there is no compensation given for Building Blocks Family’s recommendations. These are just products that I have either used, seen used, and personally think are great! 

 
Chelsea Kunde
When to Potty Train?
 
potty readiness.jpg

When should we start potty training? This is the hardest question to answer because there really is such an age range. That can feel very frustrating! It is “normal” to potty train between 18 months- 3 years of age. That is a very large gap. So when do you begin? How do you know when to start? Below are some signs to look out for and a few tips from me. 

First, please know that every child is different. Potty training is not something you want to rush. I do not believe you will miss a window. Why? Because potty training will happen. They will learn. They will not go off to college in diapers. Potty training is behavior intervention and if you have a good plan and are consistent, you will see results. I often hear, “my friend potty trained her daughter at 18 months but my little girl doesn’t care about the toilet at all, am I going to miss my chance?” NO! Truly. It is so hard to not compare. It is so hard to not fear you are missing the ideal time. Have faith that the ideal time to potty train is the time when they are ready and you are ready. Some kids show every sign under the sun of being ready (my second) and some show very little (my first). Both were successfully potty trained. 

Part of the pressure to potty train early has to do with research. Newer research has shown that younger potty training has benefits and can be very successful. Under 2 years of age, they really want to please you, and this can make the experience more successful (per newer research). While this might be true, it doesn’t mean it is always true. So many factors go into when is a good time, not just for them, but for us as caregivers as well. For example, my youngest was showing all of the signs about 4 months before we actually potty trained. We as a family were not ready to do it yet and be consistent. So we waited until the entire system was ready and we were successful. Follow your gut on timing. Make sure you set everyone up for success and start when you want to. 

I personally think the sweet spot to potty train is around 2.5 years. I personally feel like they can communicate (somewhat) and understand the process better. They also are motivated to be a “big girl” or “big boy” and craving more independence. I have had clients be successful under 2 years and over 3 as well. It really is that different for everyone. Below are some signs to watch out for. Remember, they do not need to be showing all of these to start but at least some of them. If they are showing all of them and you are ready, go for it! Please note I would not recommend potty training right before a new baby or right after. Buffer around 2 months before or after brining home a sibling to start any big change. When ready, have a plan, be consistent and take deep breaths! You got this!! 

Potty Training Signs: 

  • Age Range: 18 months- 3 years

  • Can walk and sit independently 

  • Can follow simple directions and commands

  • Shows interest in toilet and going to the bathroom

  • Can communicate when they need to go or have gone

  • Tells you before or after they have gone 

  • Wants to be changed immediately after going the bathroom in diaper 

  • Less diaper changes throughout the day (can hold pee for 1-2 hours)

  • Dry at nap or night time sleep 

  • Interest in toilet/ when others use the bathroom 

 
Chelsea Kunde
Talking to Toddlers
 
communication and toddlers.jpg

Communication & Toddlers… 

This can be quite a challenge at times. It can also be some of the sweetest moments with our toddlers. Or maybe even some of the funniest. Toddlers do say the funniest things! But the challenging times, those are the times I want to help with. What are ways we can speak to our toddlers and have them listen? What are ways in which we can communicate and have them hear us? What are ways we can set them and ourselves up for success?

I try and think about what it would be like to be two years old. I try and imagine it… For instance, I feel like it goes a little something like this… I have a lot going on in my mind but very little coming out the way I want it to. Adults just seem to stare at me when I am talking! How come they can’t understand me!? Or better yet, I have no idea how to ask for space, so I will hit instead. That seems to work well… and my imagination takes off! 

I can’t tell you how many times I have said to my own kids, “I am so sorry, I don’t know what you are saying, show mama, show mama what you want”. Or the times where they say something and I have no idea what they are saying so I start guessing, “cheese?” And they whine. I try again, “do you want more water?” And they just look at me annoyed. “The red car?”— nope! “The book?”— not that either. “The blocks?!”, “Yes!!!!” And I feel like I just solved the greatest puzzle of all time! I know others have been there too. This is the norm with toddlers. I find just remembering that they understand so much more then they can verbalize helps me stay patient and more empathetic. How frustrating for them!! 

Below are 10 quick tips to help ease into effective communication with Toddlers!

10 Quick Tips:

  1. Pay attention to how they communicate. Do they show you things by pointing? Do they tend to whine when they want something but can’t tell you? Do they use baby sign? Do they have a few words? Whatever is working for them, lets use it! We don’t have to focus on what isn’t there, lets focus on what is there. If they are super verbal, run with that. If they have only 1-2 signs, run with that. If they gesture more, run with it. It is helpful to meet them where they are at. I remember using the sign “help” with my first a lot because it was the one way we could really communicate when she was frustrated and didn’t know how to tell me. I used what she knew and it helped. 

  2. Be genuine. I find it helpful to talk to kids how I would speak to anyone else and not in a baby way. I find they appreciate that respect. Toddlers are not babies anymore and they feel that way too! I find they respond very well with this type of interaction. I also think it is important to get down on their level, look them in the eye, and have genuine interactions with them. They really take it all in. 

  3. Start small. Work on 1-2 ways they can tell you something and build from there. Maybe that is baby sign, maybe that is a word or sound. But something that is helpful for everyone to help understand one other. 

  4. Validate their feelings. When you see they are frustrated or sad, give that a name. I see you are frustrated. I understand how upsetting that is. I am here to help, I am sorry you are sad. Showing empathy and understanding creates a safe place for communication. Build on this when they are little and that respect and understanding will be helpful in teen years. 

  5. Replacement Communication: I.e model for them a better way to say something. For example, instead of saying, “I don’t like you” you can teach them to say “I need space or I am frustrated”. Instead of saying “move! Don’t touch me” you can teach them to say “I need space”. Practice ways to speak and communicate their needs and wants in a more appropriate way. 

  6. Pay attention to teaching moments. Expressions that are kind, respectful and helpful need to be taught. I always go back to personal space and the example of a hug. For example, you can say this, “If a friend wants to give a hug, but you don’t want to, you can say “No thank you.” Instead of pushing your friend. I also have used, “Please respect when people say no”. This is a way to build healthy boundaries and effective communication. It is important to teach kids to respect peoples space and to respect their own as well. 

  7. Replacement Behaviors. Tell them how you want to see them behave instead of just telling them what you want to see stopped. Instead of saying, “don’t yell”, you can say “use inside voices”. Instead of saying, “don’t hit” you can say, “use gentle hands”. Practice telling them the behavior you want to see instead of focusing on the negative behavior you want to change. 

  8. Be a broken record! Repeat, repeat, repeat! You can never underestimate the power of repetition with kids. It is important to repeat your expectations, your rules, and important messages you want them to hear, for example, “we are kind to one another”. Sometimes it can feel like they just don’t listen. Research shows it takes time for things to fully sink in and become their own. So help them to learn by being a broken record. 

  9. Patience. Always remember to slowly chip away at your goals. Always remember that learning takes time. Always remember that making mistakes is part of learning and how we grow the most. When in doubt, take a break! 

  10. Recognize the positive. Reinforce and show genuine praise when you see them using any positive communication skills. “Thank you for using your words instead of hitting!” If you want to see more of something, give it attention. Don’t forget to praise those good behaviors you want to see more of! 


Chelsea Kunde
Infant Sleepy Cues
 
Sleepy Cues pic.jpg

When the baby arrives, EVERYTHING is new! We are learning so many things and so are they. It is hard to know what day it is, let alone how to help them sleep well. I remember crying when we got discharged with our first, I just wanted to stay with the sweet nurses forever! Anyone else feel that way? I was missing my bed and home but I also liked knowing the nurses were there to help me! It all just felt so new and hard…

I want to help families feel prepared for this new stage. Here, I will share a few tips about infant sleep cues and how to start to lay a foundation from the   beginning. Learning their sleepy cues can be incredibly helpful. You will be able to tell when they are “communicating” with you that they are tired. Yes, they start communicating with you in ways other than using words. We just have to learn to pay attention ;) 

So how do you know when an infant is tired? This may seem obvious but it  really is not. Sometimes the cues are subtle. I always say, I would rather you put a baby down a little tired, then overtired. Overtired babies don’t sleep well. Overtired babies tend to cry more. A rested baby is a happy baby! Also, if we miss their cues, we may then miss a nap, then we could have an overtired baby, and you know what that means? Fussy and hard! So watching for these cues can really help avoid that overtired cycle. 

It is helpful to note that most newborns are awake for about an hour max    before they will need a nap. This does include a feed time. I find it to be    helpful to look at the clock and also the baby when we are learning their cues. Typically around 45 mins to an hour, a baby will be ready for sleep time. For example, if the baby just ate for 30 minutes, they will most likely be awake another 15-30 minutes and then go down for a nap. 

Sleep cues can be subtle so that is why looking at the clock can also help. Here are some subtle signs to look for. Red eyebrows. I know, this one seems so silly, but it really is true! Babies’ eye brows can get red when tired. Here is another one. If your infant stares off into space or you go to put baby in front of your face and they turn away, this is another early sign. They are saying, “mama, I am tired’. Watch for their body language and those red brows for early signs! When you see these early signs, know it is time to wind down. Maybe give them another 5 or 10 mins and then off to rest/nap. 

There are other tired signs a baby will show you and these signs mean the baby is ready for a nap! Remember, we don’t want to put down an overtired baby. An overtired baby does not sleep as well. If an infant rubs their eyes, starts to get fussy, yawns, grabs ear or their hair— it is go time! Time to get the baby ready for a nap. I like to change their diaper, wrap in a swaddle or sleep sack, turn on white noise, and lay down for nap (on their back!). 

Watching and learning your baby’s sleep cues is important. Give yourself time and have the clock help you. Watch the baby around that 45 minute mark   after being awake and pay attention to their cues. This will help big time for your sleep journey and setting everyone up for success! 

 
Chelsea Kunde